How to play Marvel vs. Capcom 3: Fate of Two Worlds on Mac

Game summary
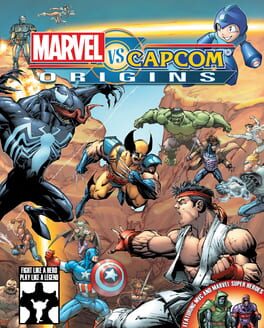
Marvel vs. Capcom 3: Fate of Two Worlds is a crossover fighting game developed by Capcom in collaboration with Eighting. The game features characters from both Capcom's video game franchises and comic book series published by Marvel Comics. It was released for the PlayStation 3 and Xbox 360 consoles in February 2011. It is the fifth installment of the Marvel vs. Capcom franchise and the first to use three-dimensional character models instead of sprites.
In Marvel vs. Capcom 3, players select a team of three characters to engage in combat and attempt to knock out their opponents. It features similar tag team game mechanics to earlier games in the series, along with new methods of play designed to make the game more accessible to new players. The game was produced by Ryota Niitsuma, who had previously worked on Tatsunoko vs. Capcom: Ultimate All-Stars, which utilizes the same simplified three-button attack system.
The game received generally positive reviews from critics, who praised its gameplay and character roster, while criticizing its online component and lack of features and game modes. More than 2 million units were shipped worldwide a month after its debut, rendering it a commercial success. Less than a year after its release, Capcom announced an updated version of the game, titled Ultimate Marvel vs. Capcom 3. The standalone update was released in November 2011, and featured additional characters, stages, and gameplay tweaks.
First released: Feb 2011
Play Marvel vs. Capcom 3: Fate of Two Worlds on Mac with Parallels (virtualized)
The easiest way to play Marvel vs. Capcom 3: Fate of Two Worlds on a Mac is through Parallels, which allows you to virtualize a Windows machine on Macs. The setup is very easy and it works for Apple Silicon Macs as well as for older Intel-based Macs.
Parallels supports the latest version of DirectX and OpenGL, allowing you to play the latest PC games on any Mac. The latest version of DirectX is up to 20% faster.
Our favorite feature of Parallels Desktop is that when you turn off your virtual machine, all the unused disk space gets returned to your main OS, thus minimizing resource waste (which used to be a problem with virtualization).
Marvel vs. Capcom 3: Fate of Two Worlds installation steps for Mac
Step 1
Go to Parallels.com and download the latest version of the software.
Step 2
Follow the installation process and make sure you allow Parallels in your Mac’s security preferences (it will prompt you to do so).
Step 3
When prompted, download and install Windows 10. The download is around 5.7GB. Make sure you give it all the permissions that it asks for.
Step 4
Once Windows is done installing, you are ready to go. All that’s left to do is install Marvel vs. Capcom 3: Fate of Two Worlds like you would on any PC.
Did it work?
Help us improve our guide by letting us know if it worked for you.
👎👍