How to play Virtual Goaltender on Mac
Game summary
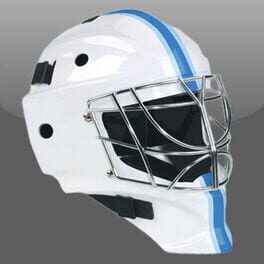
Do you have what it takes to be a hockey goalie superstar? To strap on the pads, man the net and stop some pucks? Welcome to Virtual Goaltender, a heart pumpin’, adrenaline rushin’, reflex testin’, fast-paced ice hockey goalie game.
-Challenge yourself in 70 levels of increasing difficulty from easy to insanely hard.
-Make butterfly saves, kick saves, glove saves, blocker saves, skate saves and standup saves.
-Includes many different challenges like one time shots, low and high shots, passing between shooters and intelligently aimed shots on goal.
-Features fully 3D environments, lifelike goalie motions and realistic sound effects.
-Hear the roar of the crowd as you make a save (or the boos of letting the puck slip through).
-Choose from 5 different goalies, each with their own goaltending style.
-Your choice of 5 different rinks, including a pro hockey arena or a frozen pond.
-Over two dozen camera angles, including bird’s eye and goalie’s point of view.
-Find out how fast your reflexes really are with the reaction time meter.
-Amusing commentary praising your saves and mocking the shots you let through.
First released: Mar 2012
Play Virtual Goaltender on Mac with Parallels (virtualized)
The easiest way to play Virtual Goaltender on a Mac is through Parallels, which allows you to virtualize a Windows machine on Macs. The setup is very easy and it works for Apple Silicon Macs as well as for older Intel-based Macs.
Parallels supports the latest version of DirectX and OpenGL, allowing you to play the latest PC games on any Mac. The latest version of DirectX is up to 20% faster.
Our favorite feature of Parallels Desktop is that when you turn off your virtual machine, all the unused disk space gets returned to your main OS, thus minimizing resource waste (which used to be a problem with virtualization).
Virtual Goaltender installation steps for Mac
Step 1
Go to Parallels.com and download the latest version of the software.
Step 2
Follow the installation process and make sure you allow Parallels in your Mac’s security preferences (it will prompt you to do so).
Step 3
When prompted, download and install Windows 10. The download is around 5.7GB. Make sure you give it all the permissions that it asks for.
Step 4
Once Windows is done installing, you are ready to go. All that’s left to do is install Virtual Goaltender like you would on any PC.
Did it work?
Help us improve our guide by letting us know if it worked for you.
👎👍