How to play At the Mountains of Madness on Mac

| Platforms | Computer |
Game summary
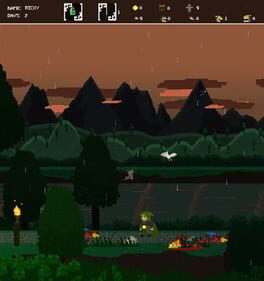
At the Mountains of Madness is an indie first-person horror adventure game with survival elements in which you assume the role of the Professor Dyer, geologist of the Miskatonic University, who in 1930 traveled to Antarctica as a leader of a research expedition. But in Antarctica disaster always lurks adventurers like a shadow. And in the most cold and desolate place on earth it is easy to find death or worse, you can find the Mountains of Madness
“I am forced into speech because men of science have refused to follow my advice without knowing why.” H.P. Lovecraft
Fight against the elements and explore ancient lands and antarctic landscapes, find your way through dark caves and unravel procedural mazes while trying to survive in a realtime 3D action adventure in search of undiscovered fossils and zones unexplored by man.
Pick and use well the items you carry on, such as food cans, wood logs, batteries, dynamite, strange things… You never know when you'll need them!
Choose if you battle monsters or if you become another shadow in this sci-fi labyrinth of psychological horror.
First released: Mar 2016
Play At the Mountains of Madness on Mac with Parallels (virtualized)
The easiest way to play At the Mountains of Madness on a Mac is through Parallels, which allows you to virtualize a Windows machine on Macs. The setup is very easy and it works for Apple Silicon Macs as well as for older Intel-based Macs.
Parallels supports the latest version of DirectX and OpenGL, allowing you to play the latest PC games on any Mac. The latest version of DirectX is up to 20% faster.
Our favorite feature of Parallels Desktop is that when you turn off your virtual machine, all the unused disk space gets returned to your main OS, thus minimizing resource waste (which used to be a problem with virtualization).
At the Mountains of Madness installation steps for Mac
Step 1
Go to Parallels.com and download the latest version of the software.
Step 2
Follow the installation process and make sure you allow Parallels in your Mac’s security preferences (it will prompt you to do so).
Step 3
When prompted, download and install Windows 10. The download is around 5.7GB. Make sure you give it all the permissions that it asks for.
Step 4
Once Windows is done installing, you are ready to go. All that’s left to do is install At the Mountains of Madness like you would on any PC.
Did it work?
Help us improve our guide by letting us know if it worked for you.
👎👍